Vue-09 插件开发
一、创建自己的插件
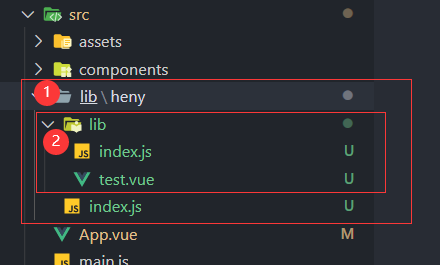
- 目录结构
- lib下面是我们所有的插件,创建一个新的插件名叫heny;
- heny下的目录是lib和index.js还有一个test.vue文件;

在heny/index.js文件写入
jsmodule.exports = require('./lib')在heny/lib/index.js写入以下代码
jsimport test from './test.vue' export default { // Vue.use默认使用install方法 // 第一个参数是Vue, 第二个参数是选项 install (Vue, options) { Vue.component('test', test) } }在test.vue文件可以写我们的公共组件代码了
vue<template> <div class='test'> 哈哈, 这是我的新插件 </div> </template> <script> export default { name: 'test' } </script> <style lang='scss'> </style>在main.js主入口文件引入创建好的test插件
jsimport test from './lib/heny' Vue.use(test)直接在App.vue将标签放入,就可以直接使用了
插件自动安装
在 UMD 构建中,插件开发者使用 Vue.use 来自动安装插件是一个通用的做法。例如,官方的 vue-router 插件是这样在浏览器环境中自行安装的:
var inBrowser = typeof window !== 'undefined'
/* … */
if (inBrowser && window.Vue) {
  window.Vue.use(VueRouter)
}
二、发布到npm
npm初始化
进入lib/heny文件夹,并执行npm init命令
name:包名,默认就是文件夹名字,但是这个名字是需要唯一的,如果你命的名字已经被使用过了,那就只能换个名字。查看是否被用,可以直接输入npm view 包名,如果报错即被使用version:包的版本,默认是1.0.0, 你可以更换,例如0.1.0或2.0.1等。description:包的描述。主要描述你的包是用来做什么的。entry point:包入口文件,默认是Index.js,可以自定义。test command:测试命令,这个直接回车就好了,因为目前还不需要这个。git repository:包的git仓库地址,npm自动读取.git目录作为这一项的默认值。没使用则回车略过。keyword:包的关键词。该项会影响到用户怎样才能搜到你的包,可以理解为搜索引擎悠哈的关键词。建议关键词要能准确描述你的包,例如:"vpay vue-pay vue-password password"author:作者。例如你的npm账号或者github账号license:开源协议,回车就好。
忽略文件不上传
创建.npmignore文件,和.gitignore差不多,希望哪些不发到npm包上面;
上传
测试插件是否可以上传到npm网上;
因为main.js引入时,都是从node_modules引入的,因此将lib/heny直接放入node_modules中,再引入的时候直接写:
jsimport test from 'heny' Vue.use(test)测试通过之后就可以直接开始发布到npmjs网上了;
注册npm账号
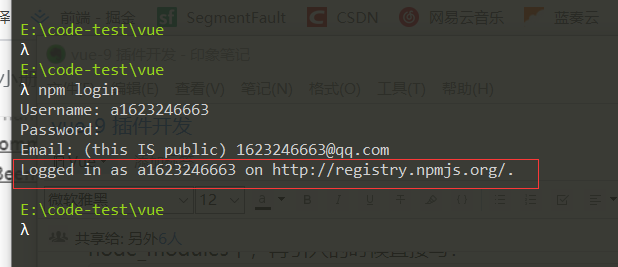
登录npm账号
如果有设置了淘宝镜像需要先设置回镜像
jsnpm config set registry http://registry.npmjs.org之后执行npm login命令登录npm;

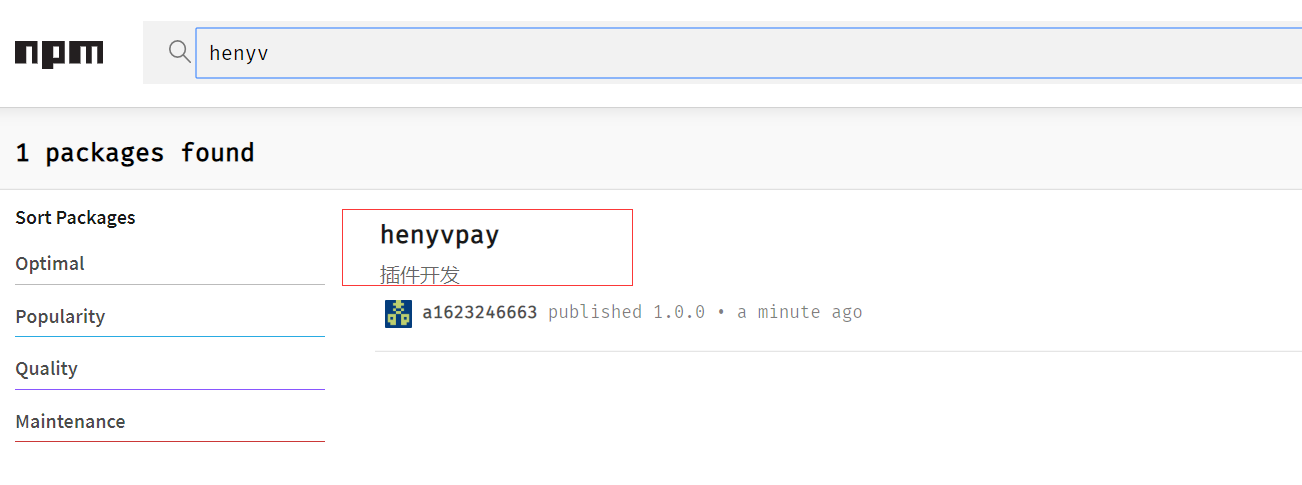
进入到项目的根目录,直接输入npm publish就发布成功了,直接到npmjs官网搜索包的name名字就有了;当然也可以直接在项目npm i 名字;

注意:第二次发布时,必须修改version版本号才能发布,否则会报错;
自动修改版本号
npm version <update_type>
type值为:
- patch 0.0.
- minor 1.*.0
- major *.0.0
其他npm管理包命令
// 撤销整个包
npm unpublish --force 包名

// 撤销某个版本
npm publish 包名@版本号
三、Vue.extend
Vue.extend属于Vue的全局API,在实际业务开发中很少使用,因为相比常用Vue.component写法使用extend更加麻烦,用于注册插件使用
使用Vue.extend创建插件,传入一个组件,或者一个对象,里面写对应的组件
之后使用$mount挂载元素得到$el,将$el添加到body里面即可;
// 使用vue单组件
import CodeComponent from './CodeComponent.vue'
const C = Vue.extend(CodeComponent)

// 使用对象
const C = Vue.extend({
    data() {},
    render() {
        return (
            <div>这是一个组件</div>
        )
    }
})

// 挂载到body上
let vm = new C()
vm.$mount()
document.body.appendChild(vm.$el)
开发一个loading全局组件
创建Loading/Loading.vue
vue<template> <div v-if="visible">{{text}}</div> </template> <script> export default { data() { return { visible: false, text: "" }; } }; </script>创建Loading/index.js
jsimport Vue from 'vue' import LoadingComponent from './Loading' const LoadingConstructor = Vue.extend(LoadingComponent) // 包装成vue实例 LoadingConstructor.prototype.close = function(){ this.visible = false setTimeout(() => { if(this.$el.parentNode) { this.$el.parentNode.removeChild(this.$el) this.$destroy() } }, 300) } const Loading = (options = {}) => { const instance = new LoadingConstructor({ data: { text: '数据加载中...', ...options } }) instance.$mount() document.body.appendChild(instance.$el) return instance } export default Loading修改main.js
jsimport Loading from './Loading' Vue.prototype.$loading = Loading在组件中使用
jsexport default { methods: { showLoading(){ this.$loading({text: '数据加载中'}) } } }