html-17 移动端布局
一、响应式布局
响应式的图片
需要给图片设置
max-width:100%;height:auto;响应式的字体
html{font-size:100%;}之后可以设置响应式的字体:
@media (min-width:640px){body{font-size:1rem;}}
@media (min-width:960px){body{font-size:1.2rem;}}
@media (min-width:1200px){body{font-size:1.5rem;}}
响应式网站的优点
减少工作量
网站、设计、代码、内容都 只需要一份
多出来的工作量只是JS脚本、CSS样式做一些改变
节省时间
每个设备都能得到正确的设计
响应式网站的缺点
- 会加载更多的样式和脚本资源
- 设计比较难精确定位和控制
- 老版本浏览器兼容不好
二、媒体查询
通过媒体查询我们可以对不同的设备指定特定的样式
- 在link标签后面输入(css2)
<link rel="stylesheet" href="2.css" type="text/css" media="screen and (min-width:1000px)">  //在link后面还引入
<link rel="stylesheet" href="2.css" type="text/css" media="screen and (orientation:landscape)">  //横屏显示
orientation:portrait //竖屏
在css文件后面直接写(css3)
@media screen and (min-width:600px) and (max-width:1000px){} //需要修改的样式写在括号里面,可以针对单独的修改样式。三、移动端布局
- 页面html头部代码说明:
<meta name="keywords" content=" "> 关键字
<meta name="description" content=""> 描述
<link rel="icon" href="images/icon.ico">插入logo标题- 设置viewport(至少记住三个)
<meta name="viewport" content="" />width=device-width
height:设置的viewport高度(一般不设置)
initial-scale=1.0:页面初始缩放比例,可以为小数
minimum-scale:最小缩放比例,可以为小数
maximum-scale:最大缩放比例,可以为小数
user-scalable:是否允许用户缩放页面,“no”不允许,“yes”允许
使用rem布局
100px=1rem;自适应;
<script>
    var deviceWidth = document.documentElement.clientWidth; // 获取浏览器的宽度
    if(deviceWidth>720){ // 判断浏览器的宽度是否大于720
        deviceWidth = 720;
    }
    var fs = (deviceWidth*100)/720; // 当浏览器大于等于720的时候,font-size 为100,720是页面设计图的宽度。
    document.documentElement.style.fontSize = fs + "px"; // 给html设置font-size
</script>
自适应布局
function Resize(){
    // 后面的40是font-size大小, 即1rem=40px
    let w = document.documentElement.clientWidth / 375 * 40
    document.documentElement.style.fontSize = w + 'px'
}
禁止手机端缩放
<meta name="viewport" content="width=device-width,initial-scale=1.0,maximum-scale=1.0,user-scalable=0">iphoneX兼容处理方案
首页必须给
meta标签添加name字段为viewport的,content值增加viewport-fit=cover;html<meta name='viewport' content='viewport-fit=cover'>单独给body增加iphonex的安全距离不起作用, 是由于
position: fixed属性,bottom: 0造成吸底了, 需要给所有的bottom: 0增加对应的安全距离, 不再写bottom: 0, 而是写bottom: env(safe-area-inset-bottom);两个函数介绍
constant:针对iOS < 11.2以下系统env:针对于iOS >= 11.2的系统
因此两个函数都得增加上
支持的变量:
safe-area-inset-left:左边的安全距离safe-area-inset-right:右边的安全距离safe-area-inset-top:上边的安全距离safe-area-inset-bottom:下边的安全距离
两种情况处理方式
bottom不是0
使用calc函数进行计算, 原有的bottom距离加上, 比如:
bottom: calc(50px + env(safe-area-inset-bottom))bottom是0
增加一个空的块, 写入如下样式
cssbody::after { position: fixed; bottom: 0; height: 0; width: 100%; height: constant(safe-area-inset-bottom); height: env(safe-area-inset-bottom); background-color: #fff; /* 需要与bottom颜色一致 */ }使用
@supports隔离兼容模式,判断浏览器是否支持该属性css@supports (bottom: constant(safe-area-inset-bottom)) or (bottom: env(safe-area-inset-bottom)) { body::after { .... } }
四、移动端布局解决方案
布局方式:
固定布局
- 页面设置单位都是px,一般设置整个页面宽度320px,
- 缺点:大于320px的页面,两边都会留白,不好看。
流式布局:
- 宽度使用百分比,高度设置px,页面会出现拉伸,不兼容。
响应式布局:
- 利用媒体查询,判断不同的设备,使用不同的css文件,比较麻烦。
- 优点是:根据不同的手机页面适配不同,用户体验极好。
- 在引入css文件后面添加media="screen and (min-width)";限制使用css文件。
- min-width最小宽度,max-width最大宽度,min-height最小高度,max-height最大高度。
rem布局:
- 设置页面html的font-size大小做比较,使用js代码获取设备的宽度给页面font-size赋值,实现元素自适应。
- 需要注意浏览器会有最小字体大小,会出现小尺寸手机文字下掉,设置单行/多行文本超出显示点状
- 图片是根据基线对齐,设置了默认页面font-size大小之后,字体变大,图片会下掉,转块可以解决。
- 图片需要设置宽高才能等比例缩放,放置背景图需要设置背景尺寸100%,否则图片大小无法根据rem等比例缩放,无法显示完整的图片。
rem单位:
- 当html{font-size:100px;}时,页面使用则1rem=100px;
em单位:
- 针对局部使用:当em的div{font-size:100px; },div里面width:1em=100px;
五、使用插件自动转换px
postcss-px2rem将px转换成rempostcss-px-to-viewport将px转换成vw
六、移动端调试
vconsole
<script src="https://cdn.jsdelivr.net/npm/vconsole"></script>
<script>new VConsole();</script>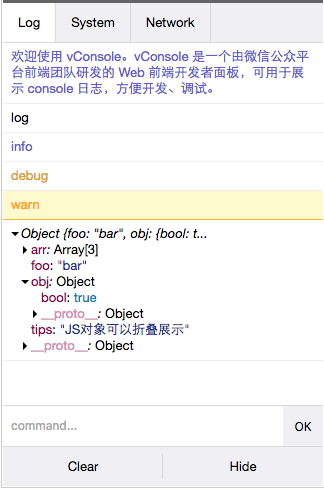
eruda调试工具
<script type="text/javascript" src="//cdn.jsdelivr.net/npm/eruda"></script>
<script>eruda.init();</script>

<!-- 使用js -->
<script id='load_eruda'>
    window.onload = function(){
      if(window.pre_host === 'uat') {
        var script = document.createElement('script');
        script.setAttribute('src', '//cdn.jsdelivr.net/npm/eruda')
        script.setAttribute('type', 'text/javascript')
        document.body.appendChild(script)
        script.onload = function () {
          eruda.init();
          document.getElementById('load_eruda').remove()
        }
      } else {
        document.getElementById('load_eruda').remove()
      }
    }
</script>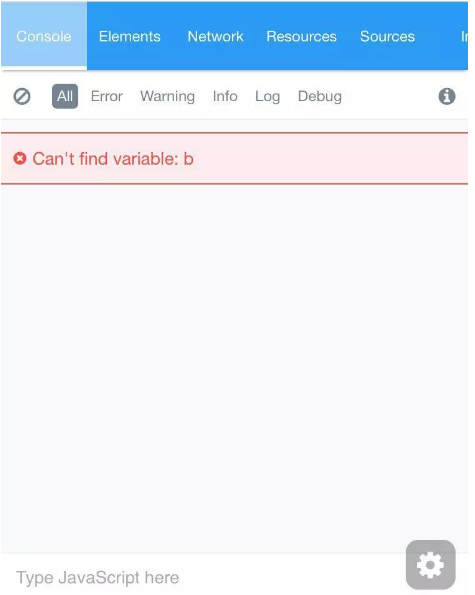
spy-debugger
前面两个都是在项目里面html标签直接引入,手机上面显示调试工具,这个需要代码操作,比较麻烦,好处是不需要针对项目调试,所有的h5网页均可调试
安装:
npm i spy-debugger -g启动:
spy-debugger手机和PC保持在同一网络下(比如同时连到一个Wi-Fi下)
设置手机的http代理,ip地址为pc的ip地址,端口为spy-debugger启动之后的端口,默认为9888;
手机安装证书:进入spy-debugger启动之后的官网 --> 点击请求抓包 --> 点击RootCA --> 手机扫描该二维码进行安装证书
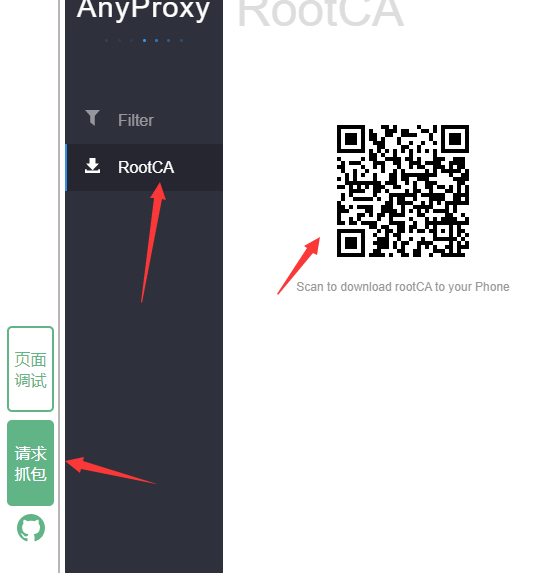
之后进入在手机里面就可以直接访问地址了,可以通过spy-debugger启动的网站,进行查看console或html元素等信息;
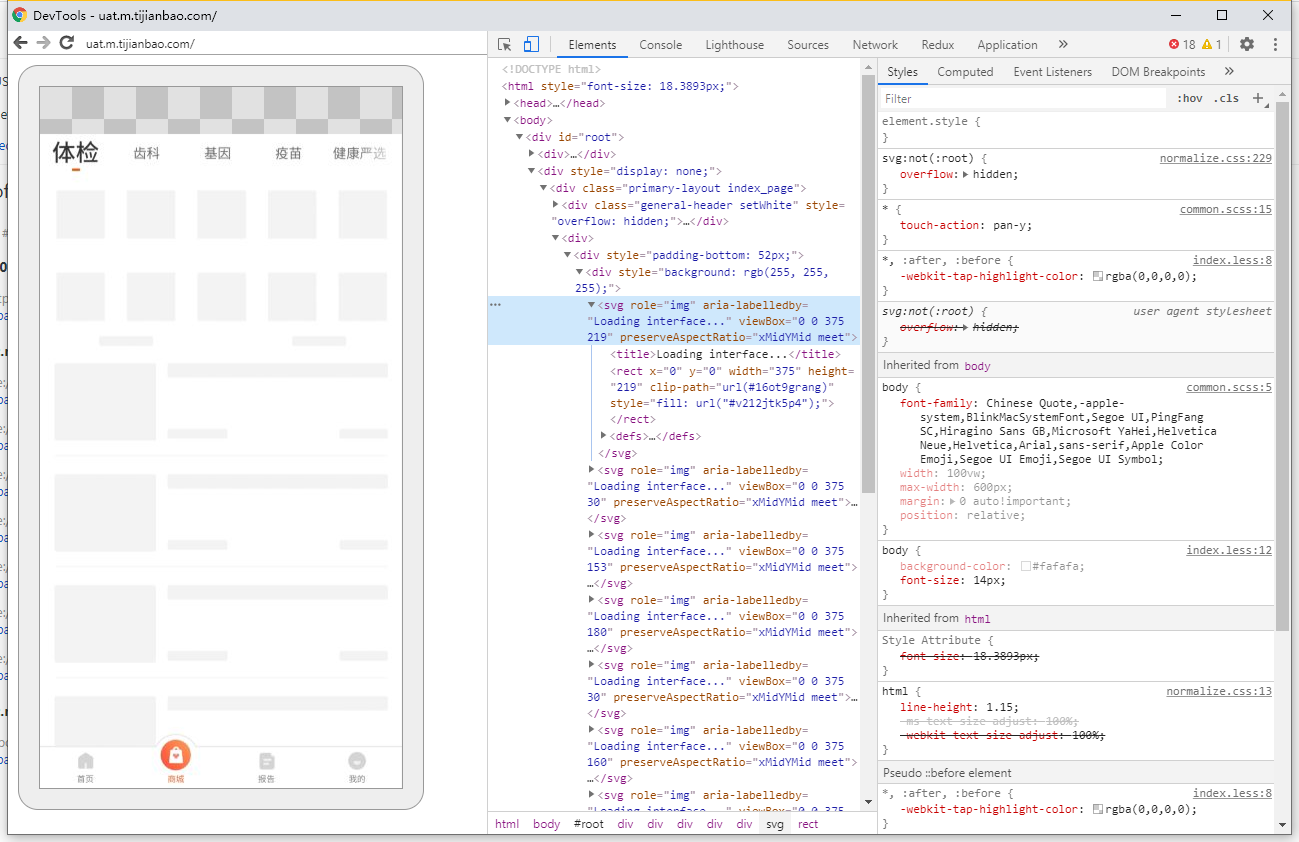
chrome直接调试
- 手机使用数据线连接至电脑
- 浏览器输入地址:chrome://inspect/#devices
- 手机安装chrome移动版浏览器,并输入地址,即可以调试;
- 出现的地址中,点击
devices直接就可以调试了;
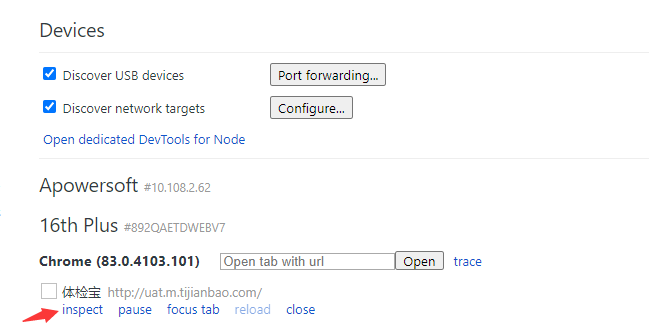
效果图如下:
移动端不能通过ip地址访问
查看webpack-dev配置,改为:host: '0.0.0.0'
七、与原生端联调
在原生端的最顶端对象同样是window,我们可以将值放在window对象上;
安卓端
举例:安卓端绑定方法到window对象上
window.*.getStatusBarHeight();ios端
h5通过在window上面绑定方法,直接调用ios的方法,ios内部调用该方法,将值传入;
ios定义一个方法,让h5调用,在这个方法内部调用h5绑定在window上的方法,并将值传送这个方法;
h5通过在postMessage里面可以直接向ios端发送消息;
window.getInfo = function(info) {}
window.webkit.messageHandlers.toH5Version.postMessage('')